
8August 2026
Caulking is easy to overlook. It is usually a narrow line around a bathtub, sink, window, door, or trim, so many homeowners do not think about it until it becomes visibly cracked or starts peeling away.
As a Hamilton handyman, I have found that failed caulk is not always just a cosmetic problem. A small gap can allow water or air to get behind the joint, damaging drywall, trim, cabinets, flooring, or other materials. The good news is that regular inspections can help homeowners identify problems early, before a simple maintenance job turns into a larger repair.
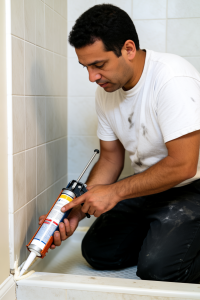
Signs That Caulk Needs Replacing
The first step is to inspect the caulk closely instead of judging it by appearance alone. Look for changes in both the caulk and the materials surrounding it.
Cracks and Splitting
Cracked caulk has lost its ability to form a reliable seal. Small cracks may appear in the middle of the joint or along the edges where the caulk meets the tub, wall, countertop, window frame, or trim.
Cracking is especially common around:
-
Bathtubs and shower corners.
-
The joint between tile and a tub or shower pan.
-
Kitchen and bathroom sinks.
-
Exterior windows and doors.
-
Baseboards and interior trim.
-
Exterior trim and siding transitions.
If the crack is exposed to regular water, rain, or snow, it should not be ignored. Moisture can work its way through even a small opening.
Peeling or Pulling Away
Caulk that is peeling, shrinking, or pulling away from one surface is no longer properly bonded. You may see a visible line between the caulk and the tub, wall, countertop, window frame, or trim.
This is one of the clearest signs that replacement is needed. Applying new caulk over loose material usually does not solve the problem because the new product is bonding to a weak, failing surface.
Gaps and Separation
A gap can develop when caulk shrinks, cracks, or separates from the joint. In a bathroom, this may allow water to collect behind the caulk or run into the wall area.
Pay particular attention to corners and transitions. These areas experience movement as materials expand, contract, flex, or settle. A joint may look acceptable along most of its length but have a small failure at one corner.
Hard, Brittle, or Loose Caulk
Some caulk becomes hard and brittle as it ages. It may not look badly damaged, but it can crack easily or stop moving with the surrounding materials.
A sound joint should remain appropriately flexible for its intended use. If the material is visibly hardened, loose, or breaking apart, it is usually better to remove it and install a fresh bead.
Do not aggressively pull at caulk that appears intact. A gentle inspection is enough to identify obvious looseness or separation.
Mold, Black Staining, or Discolouration
Black staining or mold-like growth is common around tubs, showers, sinks, and other damp areas. Sometimes the discolouration is superficial, but it can also indicate that moisture has been getting behind the caulk.
Persistent mold, dark staining, a musty smell, or caulk that repeatedly becomes moldy deserves closer attention. Cleaning the surface may improve the appearance temporarily without correcting the failed seal or moisture problem underneath.
Caulk That Keeps Failing
If caulk fails shortly after it has been replaced, there may be an underlying problem. Possible causes include:
-
Moisture behind the joint.
-
Movement between adjoining materials.
-
Poor surface preparation.
-
The wrong type of caulk.
-
An improperly sized or poorly formed joint.
-
A leak or drainage issue nearby.
Repeatedly applying another bead over the same area can hide the warning sign while the underlying damage continues.
Check the Surrounding Area
Caulk should never be inspected in isolation. The condition of the surrounding materials can help show whether moisture or air has already passed through the failed joint.
Around Tubs and Showers
Look for:
-
Soft or spongy drywall.
-
Swollen trim.
-
Water staining.
-
Deteriorated grout.
-
A musty smell.
-
Damp areas that do not dry properly.
-
Damage around shower doors or corners.
If the wall feels soft or the area remains damp, the problem may go beyond replacing the visible caulk.
Around Sinks and Countertops
Caulk around a sink helps prevent water from getting between the sink, countertop, backsplash, and wall. When it separates, water can travel underneath and damage areas that are difficult to see.
Check for:
-
Swelling below the sink.
-
Water staining inside the cabinet.
-
Damaged countertop edges.
-
Soft backsplash material.
-
Discolouration along the wall or trim.
-
A gap between the sink and countertop.
A small separation may appear minor, but repeated exposure to water can eventually damage cabinets, drywall, or trim.
Around Windows and Doors
Interior and exterior caulking around windows and doors can fail because of age, temperature changes, moisture, and seasonal movement. Hamilton’s rain, snow, temperature swings, and freeze-thaw cycles can be hard on exterior sealants.
Look for:
-
Cracked or separated exterior caulk.
-
Staining around interior trim.
-
Damaged or swollen wood.
-
Noticeable drafts.
-
Visible gaps around the frame.
-
Water marks on drywall or flooring.
A draft or stain around a window may be an early indication that the exterior seal is no longer performing properly.
My Inspection Process as a Hamilton Handyman
When I inspect caulking on a job, I do not decide whether it needs replacing based only on how clean or dirty it looks. I consider the condition of the caulk, how well it is bonded, the level of water or weather exposure, and what is happening around the joint.
I generally follow this process:
-
I visually inspect the full joint for cracks, gaps, peeling, shrinking, mold, staining, and separation.
-
I look carefully at corners and transitions because these are common failure points.
-
I check for obvious looseness, brittleness, or loss of adhesion without aggressively disturbing a sound joint.
-
I examine nearby drywall, trim, cabinets, flooring, grout, and other materials for signs of moisture.
-
I consider how the area is used and exposed, including regular shower water, sink splashing, outdoor weather, or seasonal movement.
-
Where appropriate, I observe how water behaves during normal use rather than deliberately flooding a questionable joint.
-
I look for signs that the caulk is only part of a larger moisture, drainage, or movement problem.
I do not recommend homeowners intentionally soaking a questionable joint to test it. If water has already started getting behind the caulk, adding more water may make the damage worse. Normal observation during a shower or while using a sink is often enough to identify a concern.
A Bathtub Caulking Problem That Was More Than Cosmetic
One Hamilton homeowner contacted me because the caulking around the bathtub was black, cracked, and beginning to peel away. At first glance, it appeared to be a routine recaulking job.
The warning signs included dark staining, soft caulk in several areas, and a section where the joint had completely separated from the tub. Once I removed the old caulk, I found that moisture had been getting behind the joint for some time.
Part of the wall material was damp and deteriorating, and the drywall had started to soften. The homeowner had assumed the black caulk was mainly a cosmetic mold issue, but the failed seal was allowing water to reach areas where it could cause damage.
I removed the failed caulk, opened the affected area enough to assess it properly, allowed the materials to dry, and repaired the damaged area before installing new bathroom-grade caulk.
The lesson is important: moldy, soft, or separating caulk should not automatically be treated as a simple cosmetic problem. If there is softness, staining, a musty smell, or repeated moisture around a joint, investigate before applying new caulk.
An Exterior Window Caulking Problem
Another memorable job involved exterior caulking around the windows of an older Hamilton home. The homeowner had noticed a noticeable draft and staining around the interior window trim.
The interior symptoms were not dramatic, but an exterior inspection showed that the old caulking had cracked and separated in several places. Air and water were getting through the gaps.
I removed the loose exterior sealant, cleaned and prepared the joints, and recaulked the affected areas with an appropriate exterior product. I also checked the surrounding trim for signs of moisture damage.
Fortunately, the problem was addressed before it required a much larger repair involving damaged trim or interior drywall. This is why I encourage homeowners to inspect both sides of windows and doors when possible. A problem that looks minor indoors may be more obvious from the exterior.
Should You Recaulk or Call a Handyman?
A DIY caulking repair can make sense when the problem is straightforward and the surrounding materials are in good condition.
DIY May Be Reasonable When
-
The old caulk is clearly failing but easy to access.
-
The surface underneath is dry and solid.
-
There is no significant mold or water damage.
-
The joint is short and straightforward.
-
You are comfortable removing the old caulk completely.
-
You can clean and dry the surface properly before applying new caulk.
-
You know which product is appropriate for the location.
For example, replacing a short section of caulk around a bathroom sink may be a manageable weekend project if the countertop, cabinet, wall, and sink are all dry and undamaged.
Professional Help Is Recommended When
-
The caulk keeps failing shortly after replacement.
-
The drywall, trim, or cabinet material feels soft.
-
There is persistent dampness or a musty smell.
-
Mold continues to return.
-
You see staining or swelling near the joint.
-
You cannot determine why the caulk is failing.
-
The exterior joint is difficult or unsafe to access.
-
You suspect water is getting behind a wall, window, or door.
-
The repair involves extensive damage rather than just a failed seal.
My personal rule is simple: if the surface underneath is sound and the problem is only the seal, DIY may make sense. If the underlying material is damaged or you cannot determine why the caulk is failing, have the area inspected before repairing it.
Do Not Caulk Over Failing Caulk
One of the most common mistakes I see is applying new caulk directly over old, cracked, moldy, or loose material. This may make the joint look better temporarily, but it does not give the new caulk a clean, solid surface to bond to.
A proper recaulking job usually involves:
-
Removing the old caulk completely.
-
Cleaning away residue, dirt, soap, and mold.
-
Checking for moisture or hidden damage.
-
Allowing the joint to dry thoroughly.
-
Choosing a product designed for that specific location.
-
Applying the new caulk to a properly prepared surface.
-
Allowing it to cure according to the product instructions.
Preparation makes a much bigger difference than applying a thicker bead of new caulk. A fresh layer cannot compensate for a wet, dirty, damaged, or unstable surface.
Choose the Right Caulk
Different joints require different products. Caulk that works well on dry interior trim is not necessarily suitable for a constantly wet shower or an exterior window.
For bathrooms, use a quality bathroom-grade, mildew-resistant product intended for wet areas. For exterior windows, doors, siding transitions, and trim, choose a sealant designed to handle outdoor temperatures, rain, snow, and movement.
Using the wrong product can lead to:
-
Cracking.
-
Peeling.
-
Poor adhesion.
-
Early mold growth.
-
Shrinking.
-
Failure during seasonal movement.
If you are uncertain which product to use, check the manufacturer’s instructions or ask a professional before beginning the repair.
How Often Should You Inspect Caulk?
My rule of thumb is to inspect caulking around tubs, showers, sinks, windows, and exterior doors at least twice a year. Wet areas and heavily used joints may deserve more frequent attention.
A quick inspection should include:
-
Shower and bathtub corners.
-
The joint where tile meets the tub or shower pan.
-
Around shower doors.
-
Around kitchen and bathroom sinks.
-
Window and door frames.
-
Exterior trim and penetrations.
-
Baseboards and areas where trim meets walls or flooring.
You do not need to replace caulk simply because it is old. If the joint is clean, bonded, flexible, and surrounded by dry, undamaged materials, continue monitoring it. Replace it when it shows clear signs of failure or is no longer protecting the joint.
Final Advice for Hamilton Homeowners
Caulking is a small maintenance job that can help prevent much larger repairs. A few minutes spent checking wet areas, windows, and doors may reveal a failed joint before it leads to damaged drywall, trim, cabinets, or flooring.
The most important signs to watch for are cracks, gaps, peeling, separation, mold, staining, drafts, soft materials, and persistent moisture. Do not simply cover failing caulk with another bead. Remove the old material, address the cause, prepare the surface properly, and use the right product for the location.
If everything around the joint is dry and sound, a small DIY recaulking project may be reasonable. If the caulk keeps failing, the surrounding material is soft or damaged, or you are unsure what is causing the problem, it is better to have it assessed early. In my experience, inspecting a questionable joint at the first sign of trouble is much easier and less expensive than repairing the damage after water has had time to spread.
3 Replies to “How to Tell If Caulk Needs Replacing”