
10September 2026
Yes, you absolutely can hire someone else to assemble IKEA furniture, and in many cases across the GTA, it’s the smarter move. But the real question isn’t just can you, it’s should you? As a Hamilton-based handyman who’s assembled (and re-assembled) countless IKEA pieces for homeowners in Mississauga, Oakville, Burlington, and beyond, I’ve seen where DIY goes smoothly, and where it turns a weekend project into a days-long headache.
This isn’t a generic “hire a pro” sales pitch. It’s a practical, no-BS guide based on real jobs, real mistakes, and real lessons learned in GTA homes, from condos with tight elevators to older houses with uneven floors and out-of-square walls.
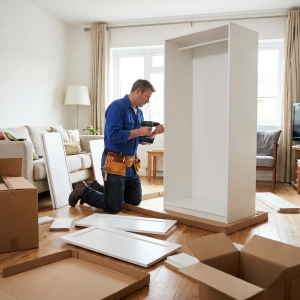
The Biggest Misconceptions GTA Homeowners Have About IKEA Assembly
Most people assume IKEA furniture is easy because the instructions look simple. Sometimes it is. But larger pieces, PAX wardrobes, multi-drawer dressers, beds, kitchen cabinets, and wall-mounted units, require far more time, precision, and physical effort than the flat-pack box suggests.
Here are the concerns I hear most often:
-
“Will hiring a handyman void my IKEA warranty?”
Not necessarily. IKEA’s warranty typically covers manufacturing defects, not assembly errors, but only if you follow their instructions. Using a qualified handyman doesn’t automatically void it. The key is proper assembly and keeping your receipt and documentation. When in doubt, check IKEA’s current warranty terms for your specific product. -
“Can a handyman really do it as well as IKEA’s service or TaskRabbit?”
Yes, if they have specific experience with IKEA systems. It’s not just about being “handy.” IKEA uses cam locks, dowels, specific hardware sequences, and alignment steps that repeat customers learn through repetition. A handyman who regularly assembles these pieces will often be faster, more accurate, and less likely to make costly mistakes. -
“Is it worth the cost?”
For small items? Maybe not. For large, heavy, or complex builds? Absolutely. You’re not just paying for labour, you’re paying for experience, proper tools, risk avoidance, and a finished result that’s level, square, safe, and built to last. -
“What about getting it into the room?”
This is where many DIYers get stuck. In GTA condos and older Hamilton homes, narrow hallways, tight stairwells, low-clearance elevators, baseboards, and uneven floors can turn a simple assembly into a logistical puzzle. Pros plan for this upfront.
Real Stories: When DIY IKEA Assembly Went Wrong (and How It Got Fixed)
The Wardrobe That Wouldn’t Line Up
One homeowner in Mississauga started assembling a large IKEA wardrobe on their own. The first few steps felt straightforward, so they kept going. But by the time they reached the doors, nothing aligned. The unit wasn’t sitting level, and the frames were slightly twisted.
They called me before making it worse. I disassembled the affected sections, re-squared the base frame, levelled the unit properly, adjusted the door hinges, and anchored it securely to the wall. The finished result was solid, smooth-operating, and safe.
The lesson? With large IKEA furniture, getting the base perfectly square and level is critical. A small error early on compounds into major alignment issues later.
The Dresser Built Backwards
Another common scenario: a homeowner gets several steps into assembling a dresser or storage unit, only to realize a panel or bracket was installed backwards. Rather than stopping, they try to force the rest of the build to fit.
I’ve had to carefully backtrack on jobs like this, removing incorrectly installed components, rebuilding sections correctly, and then finishing the assembly. It’s doable, but it adds time and risk of damaging particleboard or stripping hardware.
The takeaway? If something doesn’t fit smoothly, stop. Don’t build five more steps on top of a mistake.
When It Makes Sense to DIY IKEA Furniture (and When It Doesn’t)
You don’t need to hire someone for every IKEA purchase. Here’s my simple framework:
Good Candidates for DIY Assembly
-
Small coffee tables, nightstands, or side tables
-
Basic bookshelves under 1.2 metres tall
-
Simple desks or TV stands with minimal hardware
-
Pieces you can lay out fully on the floor with room to rotate panels
-
Projects where you have time, patience, and a second person available
If you’re comfortable following instructions, have basic tools, and aren’t racing against a move-in deadline, these are usually manageable.
When to Seriously Consider Hiring a Handyman
-
PAX wardrobes, large bedroom storage systems, or multi-unit configurations
-
Beds (especially loft, bunk, or Murphy-style)
-
Dressers with 6+ drawers or tall shelving units requiring wall anchoring
-
Kitchen cabinets or built-ins involving plumbing, electrical, or structural considerations
-
Furniture going into tight condos, older homes with uneven floors, or rooms with limited working space
-
Situations where you live alone, have mobility limitations, or need multiple pieces assembled quickly
My rule of thumb:
Small + simple + plenty of time = DIY is reasonable.
Large + heavy + complicated + wall anchoring = hire an experienced handyman.
Pro Tips for a Solid, Long-Lasting IKEA Build (Whether You DIY or Hire)
The difference between a wobbly build and a rock-solid one comes down to preparation and technique, not expensive tools. Here’s what I do on every IKEA job:
-
Clear and protect your workspace. Don’t assemble a large wardrobe in a cramped bedroom if you can avoid it. Lay down floor protection and ensure you have room to rotate large panels without hitting walls.
-
Inventory and sort hardware before starting. IKEA bags look similar. Separate screws, dowels, cam locks, and brackets into groups. It prevents the classic “I used the wrong screw three steps ago” panic.
-
Upgrade beyond the included Allen key. Use a quality screwdriver set and a drill/driver on low torque. Be careful—particleboard strips easily if you overtighten.
-
Check floor levelness and wall plumb. Especially in older Hamilton homes. Don’t assume your floors are flat. Adjust during installation, not after.
-
Don’t fully tighten everything too early. Leave fasteners slightly loose while squaring the frame. Tighten everything only once the structure is aligned.
-
Anchor tall or top-heavy pieces properly. Use appropriate hardware for your wall type (drywall, plaster, stud, concrete). Safety isn’t optional.
-
Never force anything. If a dowel, cam lock, or panel isn’t lining up, stop. Figure out why. Forcing IKEA hardware is the fastest way to ruin a piece.
My basic formula:
Prepare space → Sort hardware → Assemble carefully → Square and level → Tighten properly → Anchor when required → Test every door and drawer.
Taking an extra 15–20 minutes upfront can save hours of frustration later.
My Blunt Advice: Should You Call Someone for Your IKEA Build?
If you’re staring at a pile of IKEA boxes and already feeling overwhelmed, don’t convince yourself you’ll “figure it out as you go.” If you have the time, space, tools, and confidence, go for it. But if you’re looking at multiple large boxes, a complicated wardrobe system, heavy panels, or furniture that needs wall anchoring, paying for experienced help is often cheaper than paying for your own mistakes.
The biggest red flags I see:
-
“I’ve already started, but something doesn’t look right…”
Stop. Don’t keep building on top of a mistake. A small error now becomes a major repair later. -
Trying to assemble a large piece completely alone.
Many IKEA instructions explicitly call for two people. Large panels are awkward and heavy. Trying to hold everything while fastening is when walls, floors, panels, and fingers get damaged. -
Ignoring wall anchoring requirements.
Tall dressers, bookcases, and wardrobes can tip over. If the instructions say to anchor it, anchor it. Properly.
My final rule:
If you’re confident you can finish it correctly, do it yourself.
If you’re already wondering whether you’ll finish it correctly—that’s your answer.
A handyman isn’t just there to turn the Allen key faster. It’s about getting your furniture assembled safely, square, level, properly anchored, and finished without turning your weekend into a frustrating repair project.
Serving GTA Homeowners Who Want IKEA Furniture Done Right
If you’re in Hamilton, Mississauga, Oakville, Burlington, or the surrounding GTA and you’ve got IKEA boxes piling up, or you’ve started a build and realized it’s more than you bargained for, I’m happy to help. I specialize in efficient, precise IKEA assembly with attention to levelling, alignment, and safe installation.
No pressure, no upselling, just honest advice and quality work. Because at the end of the day, your furniture should look great, function smoothly, and stay that way for years.